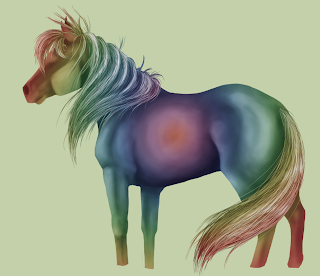
An easy way to reproduce the same image in many different colours and patterns is using greyscale bases combined with clipping masks and layer styles over the top.
Above is an example of some tags I've worked on previously using greyscale bases.
As you can see it's easy to make multiple copies with completely different colour values like blue and yellow to more natural colours and variations.
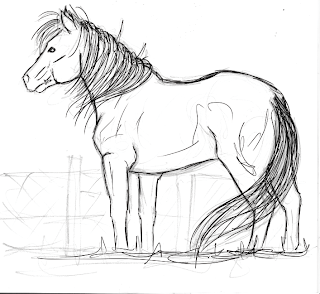
To do this I first scan in a sketch or draw directly within Photoshop. Then I use a small hard brush with 100% opacity and flow with the pen pressure turned on to make a lineart of the sketch (making sure it's on a new, transparent layer).
 |
| original sketch |
 |
| lineart |
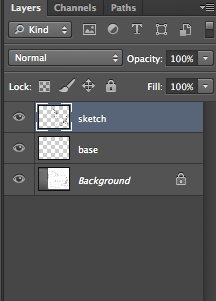 |
| view of layers palette |
|
After that I colour the base with a 50% grey colour and clean up the edges with a small eraser. Then I lock the layer so when I add tone it doesn't splash outside the clean edges.
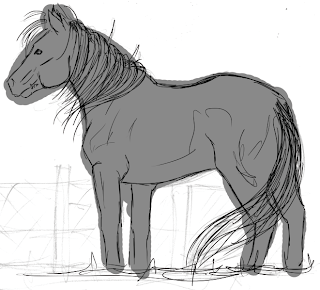 |
| rough base |
 |
| cleaned up |
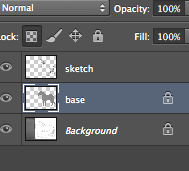 |
| the locked layer |
When I've locked the layer and cleaned up the base I then start adding tone by using a medium hard brush with approximately 15% opacity and 20% flow. This allows me to build up the tonal values smoothly.
 |
| brush settings |
When I start to add tone I hide the lineart layer so that I can make a more realistic looking painting, however when I hide the lineart you can see the base has jagged edges which again I must clean up.
 |
| hidden lineart, jagged edges. very rough tone added |
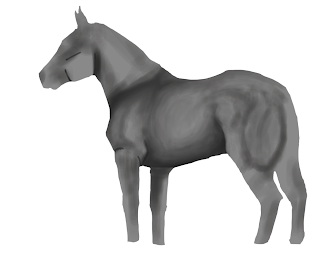
From there on out I just keep building up the tone. After a while I also add a clipping mask with a rainbow gradient to check that the tone isn't getting too dark or too light in places. I also start painting the hair at this time. For the hair I use a harder brush with the pen pressure on to first sketch out the general flow and direction of it. Then I use a darker shade of grey to add details, and I use the hue and saturation tool to change the darkness of it until it's at the right point. After completing the hair I use the dodge and burn tool to add shadows and highlights.
 |
| close up of hair |
 |
| the rainbow gradient to check tonal values |
When it's finished I can start adding colour using layer styles. There will be another post soon about this!


No comments:
Post a Comment